
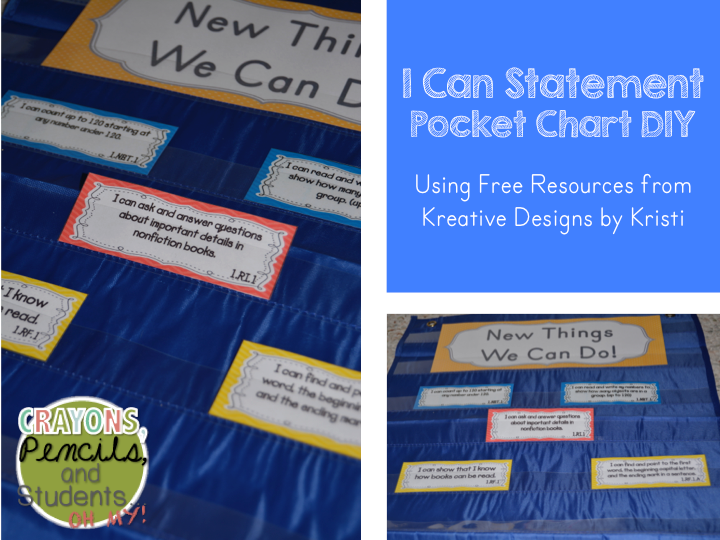
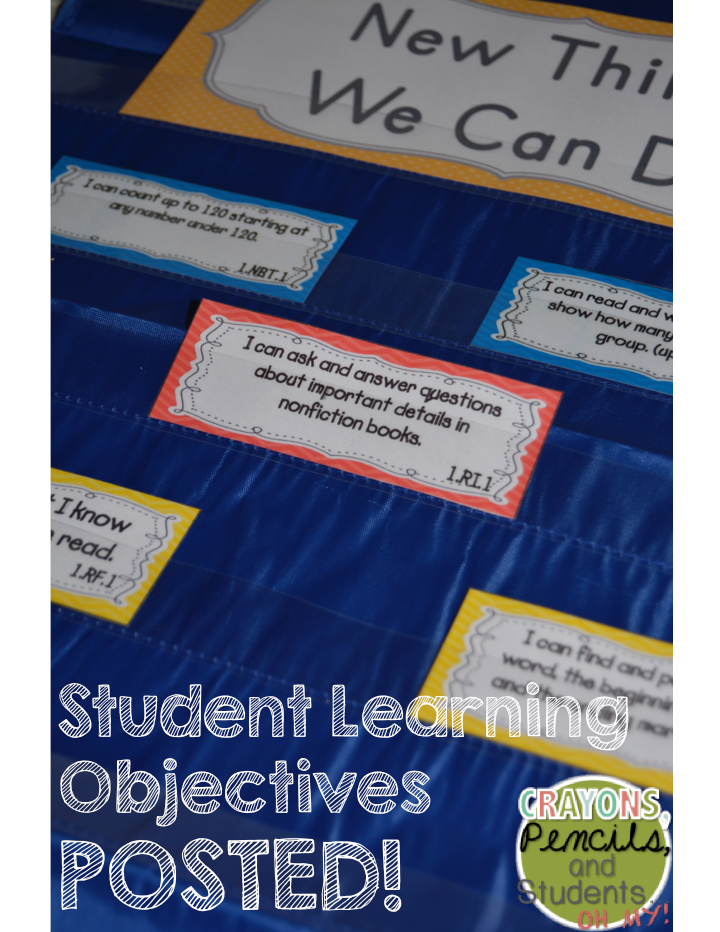
The school that I work in requires teachers to post Student Learning Objectives in student friendly language. I hate having to write them out every week, especially because many objectives are repeated over multiple weeks. I decided that I wanted a card system to use on a small pocket chart. This is what I came up with and I LOVE it!
I decided to look for I can statements on Teachers Pay Teachers that align to the Common Core Standards. There are many available, both free and paid. Once I decided I wanted a card system and knew that these were available I decided to use ones that someone else made over making my own because there was no need to reinvent the wheel on this one. I came upon some really nice looking ones for first grade at Kreative Designs by Kristi.
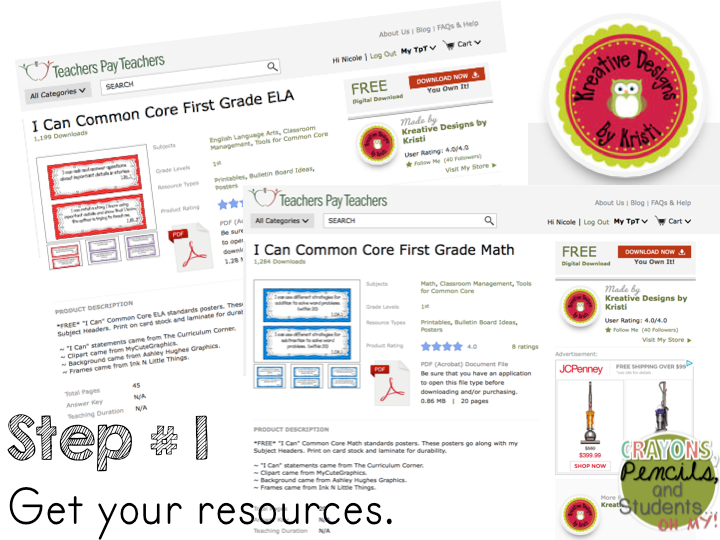
And that became my first step in the creation of this pocket chart. I downloaded both the math and ELA packets and got started. These cards are also color coded which came in handy later on. Get the Math ones here, and the ELA ones here.
After I downloaded the cards I decided that I did not want mine to be so big. I knew that I would be using several of them each week - as I planned to put up I can statements for the whole week on Monday and then switch them out the following week. I knew that If I had kept them as large as they were when I downloaded them that I would have to take up a lot of space in my classroom. So I decided to shrink them down. This became my second step, making these free resources work for me so I didn't have to reinvent the wheel.
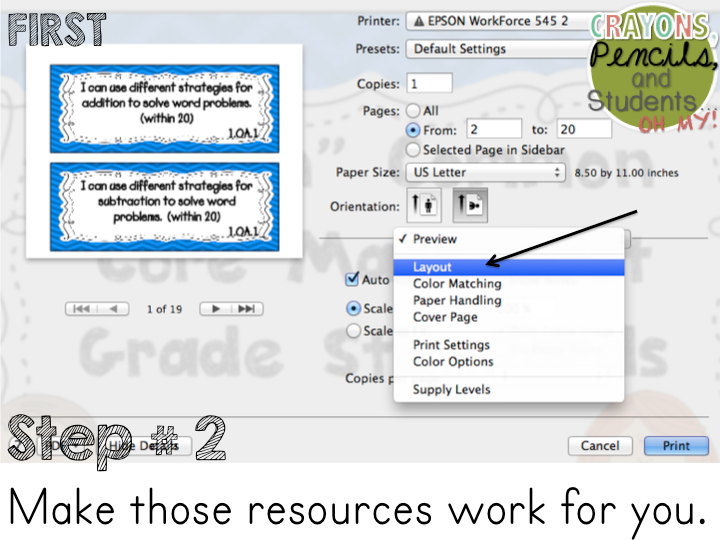
The first thing I did was click to print them I chose to print pages 2 - 20 of the math packet because I didn't need the title page. I then went to ht pull down menu (see arrow) and chose layout. This will get me where I needed to look to resize these cards.

Next I changed the pages per sheet to 4. This will allow 4 of the pages in the packet to be printed on one piece of paper. Now, this saved me paper, ink, and space on my walls in my classroom - a win, Win, WIN! To make sure you have done it correctly the preview should show the shrunken cards like it does in the screenshot above.
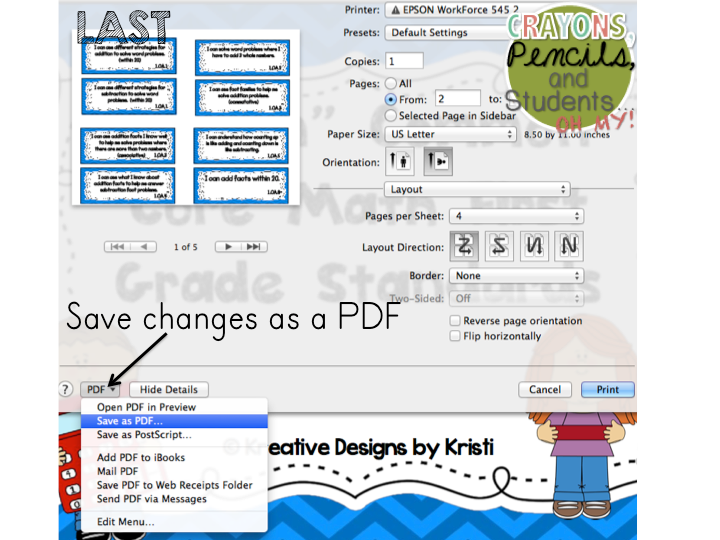
Last I saved these changes into a PDF. This way if I ever had to print them out again I have them already set. I then repeated these steps for the ELA cards and printed them all out. After printing I laminated them all with my Scotch laminator which works like a charm - you can get one here! Then I cut them all out. They ended up being about 4x1.5 inches.

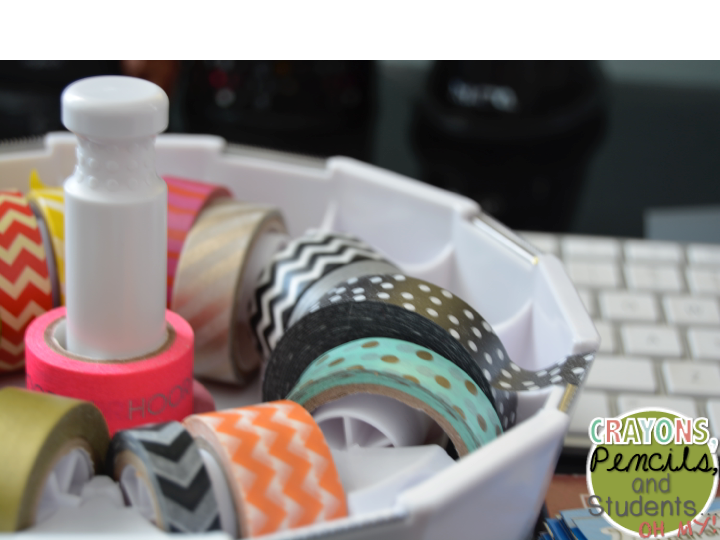
So after I had this huge stack of cards I knew I had to come up with some sort of organizational system for them. I remembered having this plastic index card tub and decided that that would be the perfect fit. But they needed a better way to stay organized within the tub, so the dividers were born. I looked to my trusty paper crafting supplies (p.s. I LOVE Project Life) and pulled out a tab punch, scrapbook paper, and some washi tape.
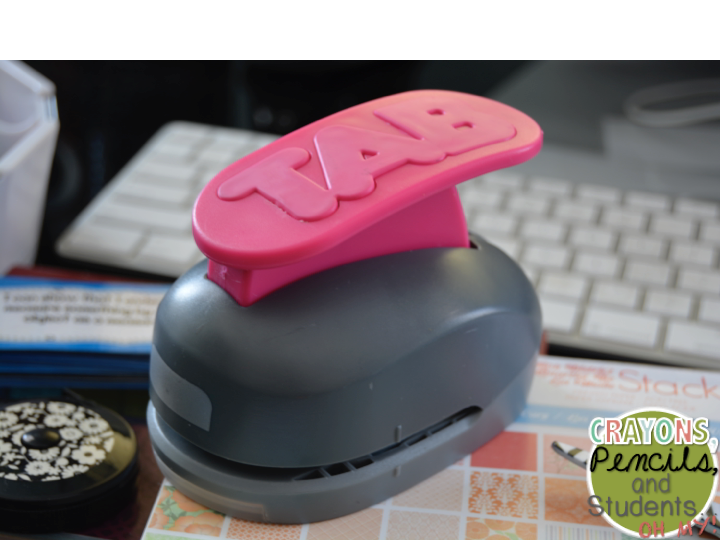
- Note, if you do not have either of these you can buy plastic tabs for index cards and use nail polish remover to take of the pre printed letters, or you can cut them out yourself using a template online. I would highly suggest investing in a tab punch - I use mine all the time and more so for teaching things than crafting things. I like the ability to make tabs for any sized page and find it highly convenient. You can get it on Amazon here, but Michaels also carries it and you can use one of their coupons and get a 15% teacher discount (that's how I bought mine!)
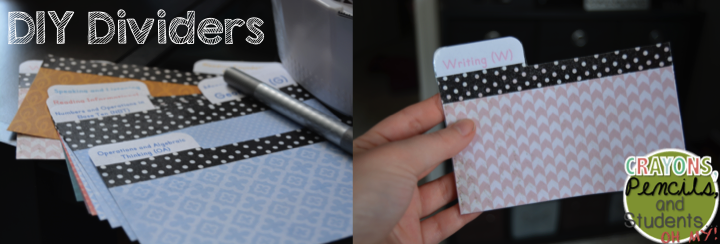
I typed my tabs up in a word document using text boxes. It came out pretty messy but it did not matter to me because I knew that I would be punching them out. I have included these in a free download through a google drive document for you.
Then, I cut some colored craft paper to 3x5 and color coded it with the colors of my I can statement cards. I took my tabs and taped them to the top of the craft paper with wash tape and trimmed off the excess. I then ran all of these through the laminator as well for durability. They turned out like this:
Then I piled all of my goodies into that index card tub that i "had". Well I thought I had one but could not find it anywhere. I still am 99% positive I have it but cannot find it. Anyways I got too fed up looking for it and finally caved and bought a new one at Staples. It was $3.50 which I thought was a tad much but I bought it anyways. While I was there I did find 50 CENT border on sale which made up for it. Here's what it looked like then.
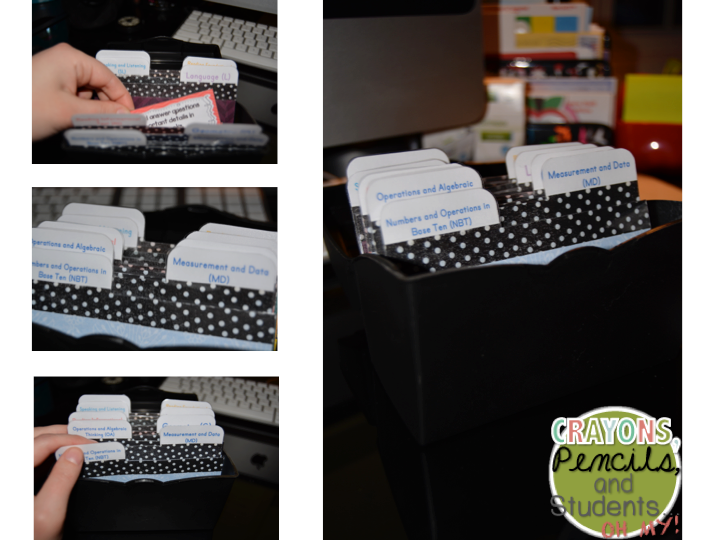
And I ended up with this as the final product and I am really happy with it. I actually found the pocket chart at a Target dollar spot a while back. I only purchased on because it was one of the things that was $3 instead of $1. Looking back on it I wish I had purchased more as it is a really nice size and I haven't ever seen any others this small.
I hope this will help you if you have had some trouble figuring out how to post your objectives in student friendly language. As one last piece of information here are links to free downloads on Teachers Pay Teachers:
Second Grade: Math and ELA here
Enjoy! If you are in my area enjoy your snow day! Oh my goodness we have so much snow here and no plows have been through yet. It does look very pretty though. Happy Monday!
* An update, I just found out that the wording for these cards came from The Curriculum Corner. You can visit them by clicking on the link. You can also download their I can statement posters by clicking here.*

No comments:
Post a Comment